If you have a contact form, a WooCommerce store or any sort of plugin that sends out emails from your WordPress website, you may have experience with those emails landing in the spam folder of the receiver. Or worse, they never get sent at all.
This is a common problem you’ll encounter with most web hosting providers, but it doesn’t necessarily indicate any problem with the hosting service itself.
Why Does It Happen?
The reason for those emails ending up in spam is because email providers like Gmail or Outlook will treat them as such since they’re not coming from a server of a known and trusted email provider.
Sometimes, the email sent by your website might get discarded by the receiver’s email service without it even being placed in spam.
But there are also instances where your hosting provider might have blocked the ability for websites to send emails. This is done to prevent customers from using the email services for harmful activities.
How to Avoid the Spam Folder
Well it’s simple. As I mentioned earlier, your emails end up in spam mostly because they originate from an untrusted source. So we can send the emails through a trusted source.
Step 1 – Sign Up With an Email Sending Service
There are email sending services built for this exact purpose. These are similar to Gmail or Outlook, but you won’t get an email inbox or any place to receive emails. They simply allow you (or in this case, your website) to send out emails using their trusted servers.
While there are many, below are two services I have personally used and they also provide free plans to start out with:
- Brevo – If you’ll be sending marketing emails from your website.
- Mailgun – If you’ll be sending WooCommerce order emails, contact form emails or other generic emails.
Sign up for one of them and follow through with their introduction and set up an email sending domain and any DNS records.
I’d recommend using a secondary subdomain like emails.yourbusiness.com instead of your main domain. This will avoid any conflicts with setting up business emails for @yourbusiness.com.
After that, continue on to Step 2 where we’ll install a plugin to use these services. The plugin also provides a list of other email sending services which you can check out.
And just as a note, it is possible to use an existing Gmail/Outlook or similar service, but since the main purpose of these services are not sending emails from websites, it’s a lot more difficult to correctly set up since it will mean having to deal with security measures like one-time passcodes.
Step 2 – Install a WordPress Plugin
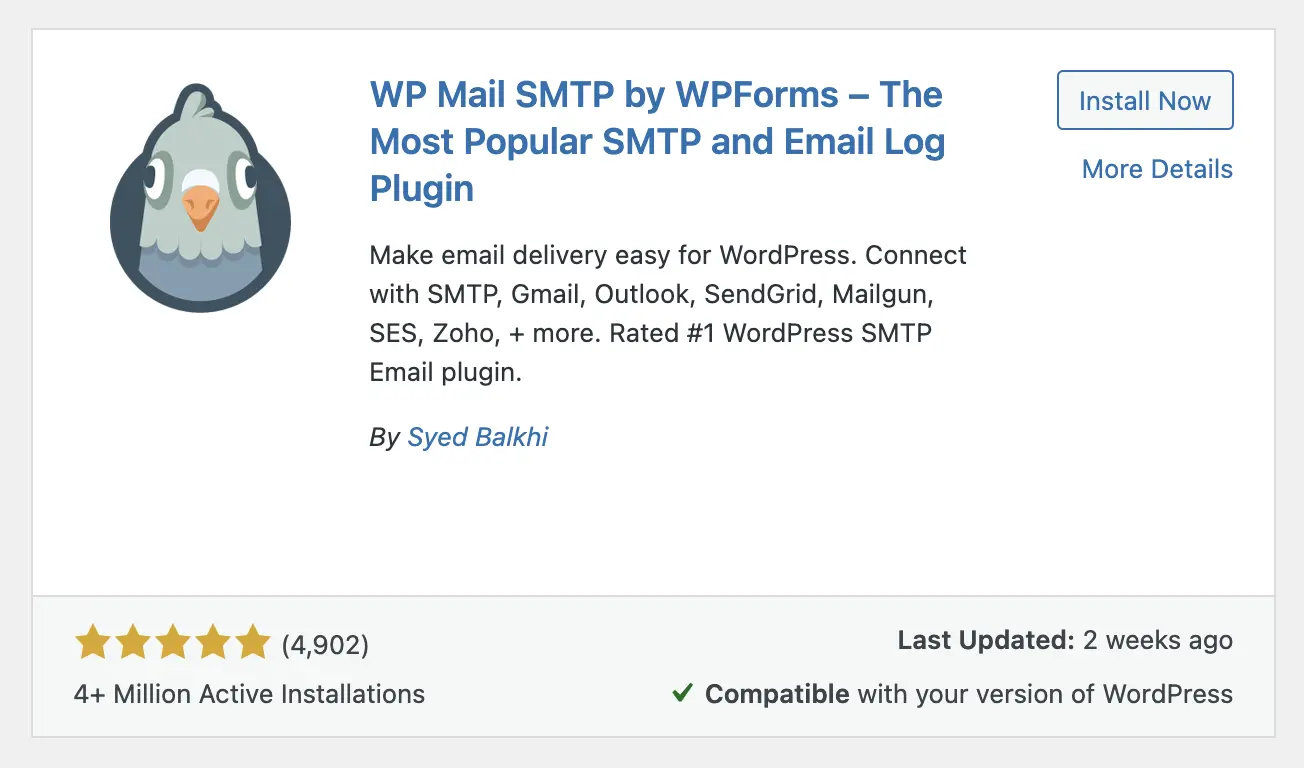
Next, you’ll need a WordPress plugin that’ll allow you to set up an email sending service on your website. As usual, there are many plugins. But the most popular, and the most easiest to use would be WP Mail SMTP by WPForms.
Search and install the plugin on your website.
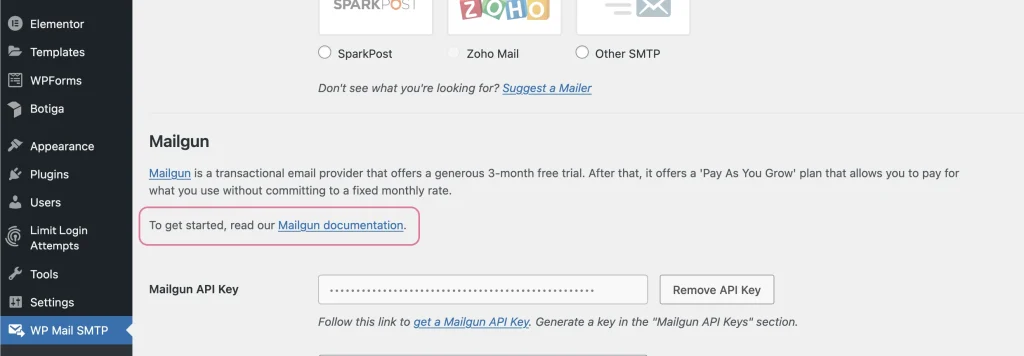
Step 3 – Configure the Plugin
The last step is to connect the email sending service you signed up for to the WordPress plugin. The exact steps will vary depending on the service you signed up for, but the plugin we recommended provides many guides for each service which you can find and follow along.
After setting everything up, you can go to WP Mail SMTP > Tools from the WordPress sidebar and send a test email to yourself to see if it lands in the inbox.
Final Words
I hope this helped you to fix your WordPress emails and avoid them from being placed in spam. Having reliable email delivery is especially important if you’re running something like a WooCommerce store.